Set the time periods that may be used during attendance and set various parameters. The timetable is the minimum unit in personnel attendance time settings. For example: These settings include work start/end time, allowed late arrival/early leaving duration, whether check-in/check-out is mandatory, allowed time period for check-in/out, rest time, and overtime.
Before scheduling the shift, you must set all shift timetables possibly used. Only in this way can various parameters set be valid.
Choose Attendance >> Timetable to access the Timetable interface:
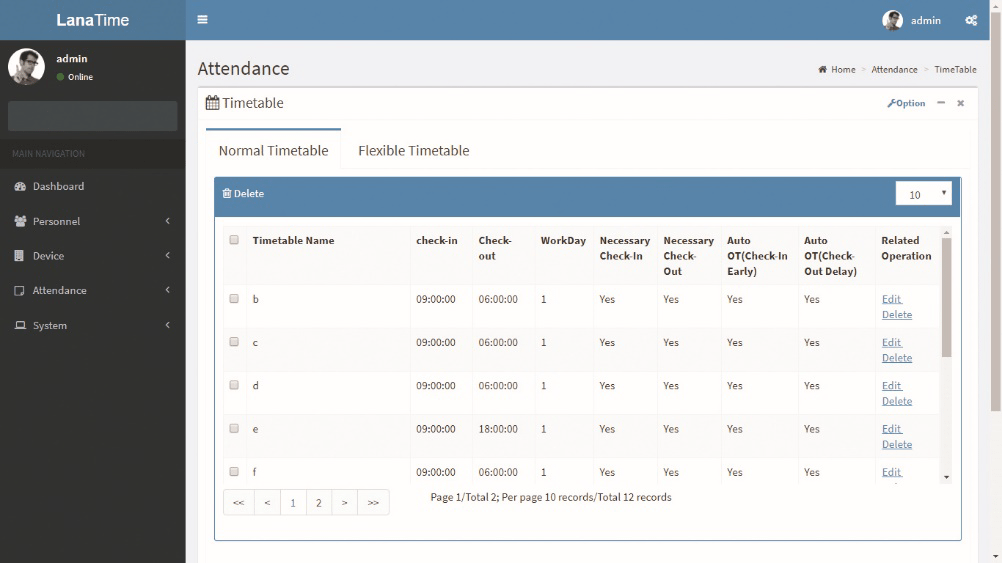
The system will set a default shift with the name of Flexible Timetable.
Flexible Timetable: Work delay is not counted as overtime, and late arrival, early leaving or absence is not calculated.
The attendance for a flexible time period is calculated by the even number of card-punching times. The line numbers of its report are generated automatically. If four records exist, the daily report on that day has two lines. If six records exist, the daily report has three lines. Besides, the attendance time in a time period is check-out time minus check-in time.
Adding a Time Table
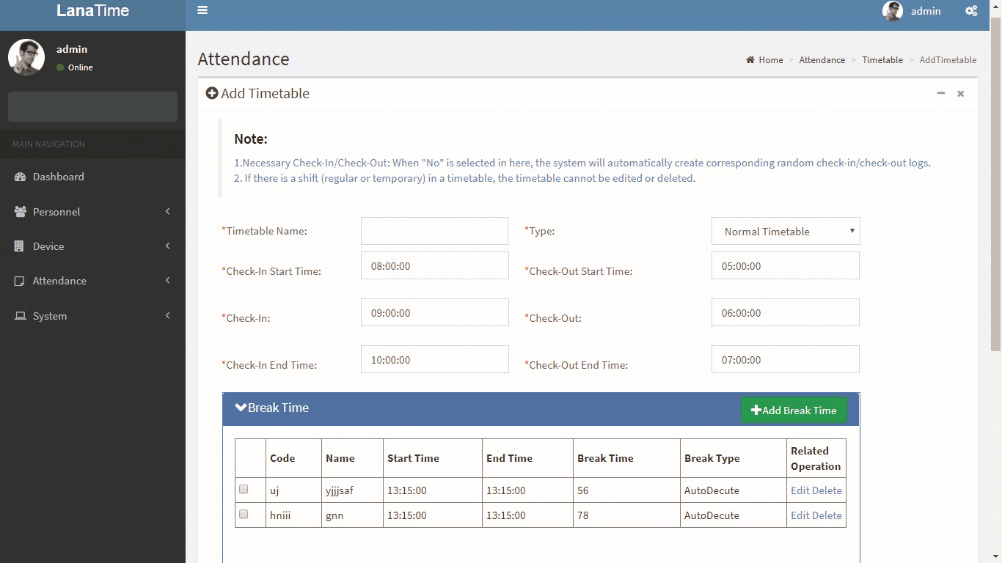
1. Click Add on the Timetable interface to access the Add interface:
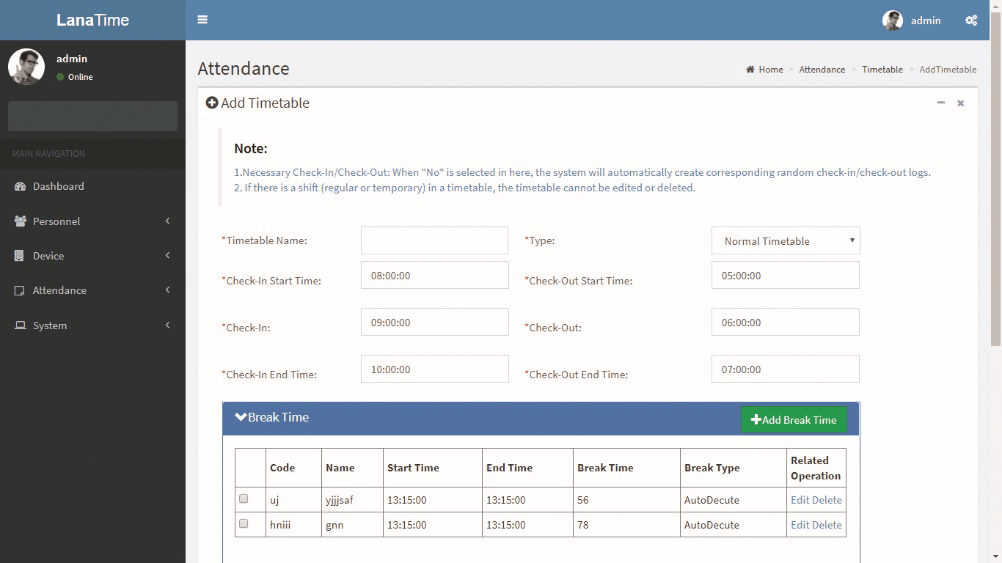
Set the parameters as required based on the following steps:
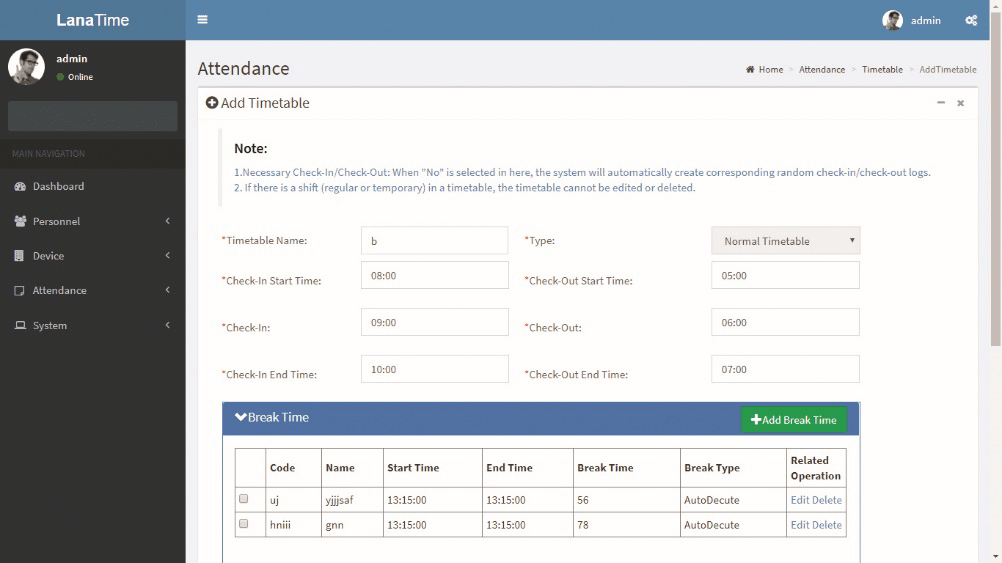
Timetable Name: Enter any characters with 20 characters at most.
Check-In Start Time / End Time, Check-Out Start Time / End Time: valid range for checking in/out in this time period.
Check-in/out records out of this range are invalid. The start check-out time cannot overlap the end check-out time.
Check-In Check-Out: Set the check-in time and check-out time.
Necessary Check-In /Necessary Check-Out: Decide whether check-in and check-out are mandatory in the selected time range. If an employee needs to check in/out, select Yes otherwise, select No.
Late Arrival/Early Out: This refers to the permissible time for late arrival/early leaving before the designation of late arrival/early leaving starts during specified working time.
For example, if Allowed late minute is set to 5 and check-in time is set to 9:00; Employee A checked in at 9:03 and Employee B checked in at 9:05, we can conclude that Employee A is not late as the interval between his or her check-in time and check-in start time is less than 5 minutes and Employee B is late for 6 minutes as the interval between his or her check-in time and check-in start time exceeds 5 minutes.
Workday: It refers to how many workdays are calculated for each shift. If a value is set for it, the workday will be calculated according to the present value. Otherwise, the workday will be calculated according to settings in the attendance rules.
Auto OT: When overtime is calculated, if select Yes for Count Delayed Time as Overtime, the overtime is the delayed time (the difference between check-out time and check-out end time) + the fixed overtime (minutes) during this timetable. The value is 0 if No is selected for Count Delayed Time as Overtime.
After the completion of the settings, click OK to save the settings and return to the Time Table interface. The timetable list displays the added timetable.
Notes:
1. The interval between check-in start time and check-out end time is not allowed to exceed the maximum / minimum timetable length set in the system.
2. There is no timetable with the same start time and end time.
Adding a break time
Choose Attendance >> Timetable>> edit Timetable >>add brak time:
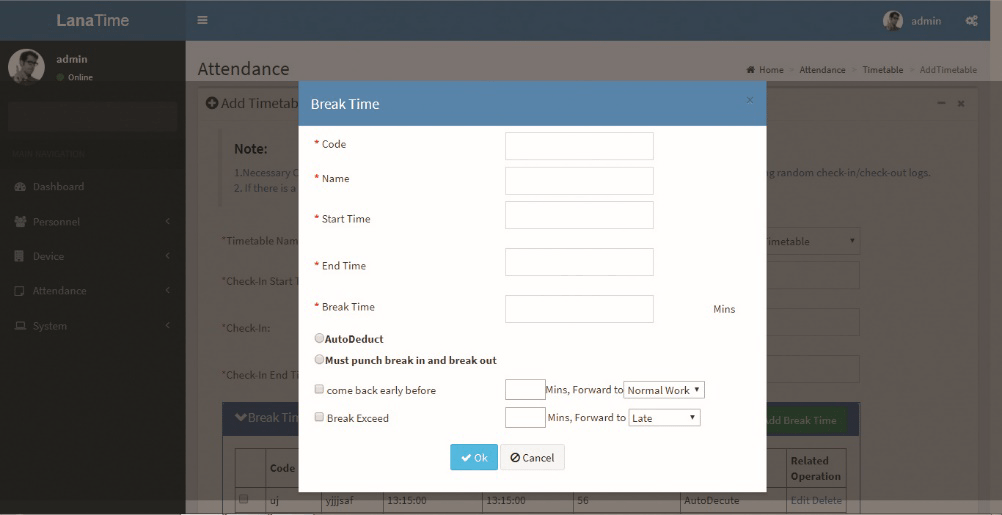
Set the parameters as required based on the following steps:
Code: Enter the code to break time
Start Time / End Time: valid range for break start time/end time.
Break time: total break time
Auto deduct: automatically select break time
Editing a Time Table
1. Click Timetable Name or the corresponding Edit under Related Operation to access the timetable edit interface.
2. Modify relevant settings as needed. The detailed modification method is the same as the operation of adding a timetable. Click OK for saving after completing the modification.
Deleting a Time Table
Select a timetable, click Delete on the upper left of the timetable list or directly click Delete under Related Operation to access the timetable deletion confirmation interface.
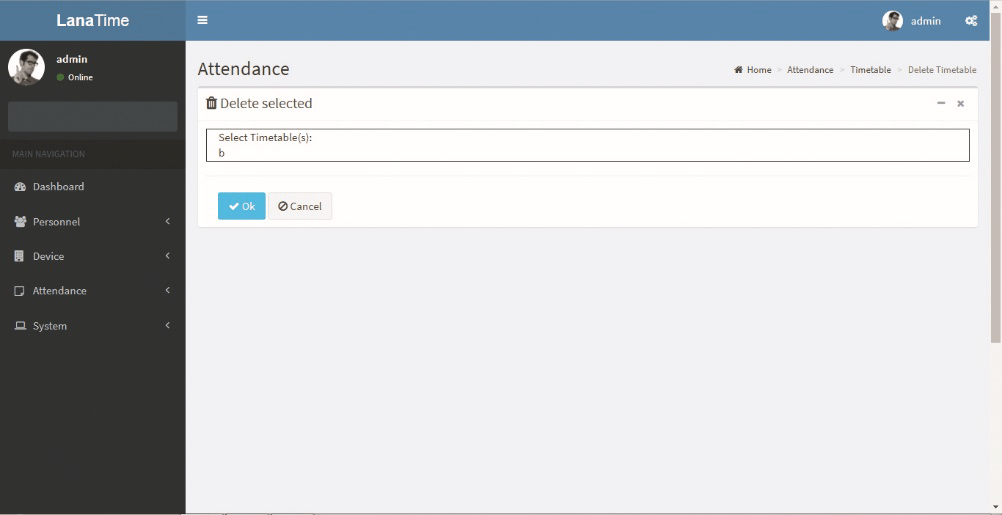
2. Click OK to delete this timetable and return to the Timetable interface.
Note: The default flexible timetable in the system is not allowed to be deleted.
Flexible timetable
In this module we can add flexible timetable we can add
Set the parameters as required based on the following
After settings click OK BUTTON