When starting to use this management system, you need to register personnel in the system or import the personnel information in other software or data to this system. For specific operations,
ADD PERSONNEL
Choose Personnel >> Personnel > Add to access the personnel adding interface.
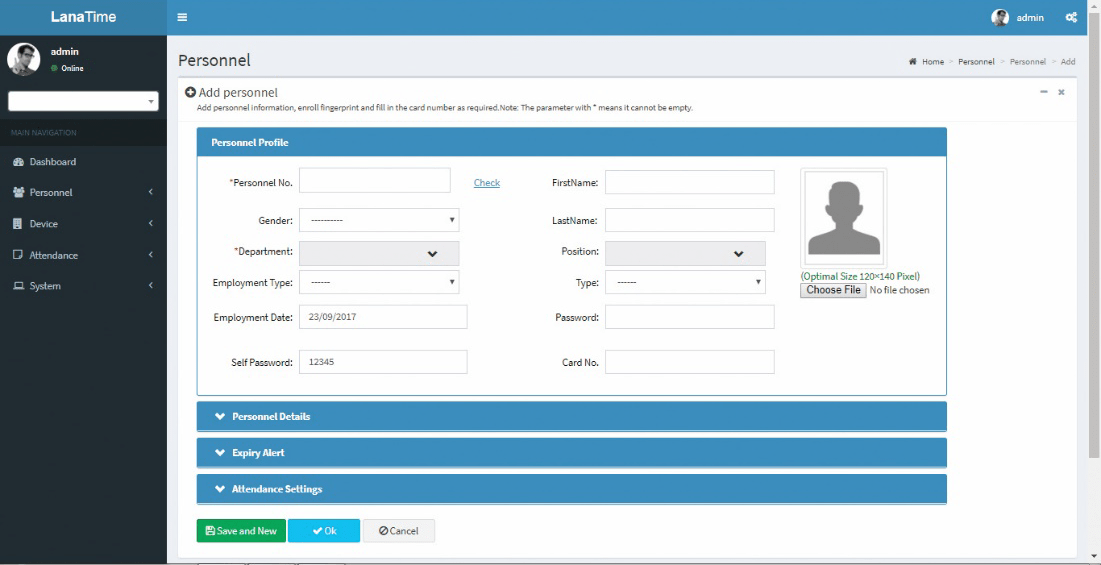
Set the parameters as required based on the following steps:
PERSONNEL PROFILE
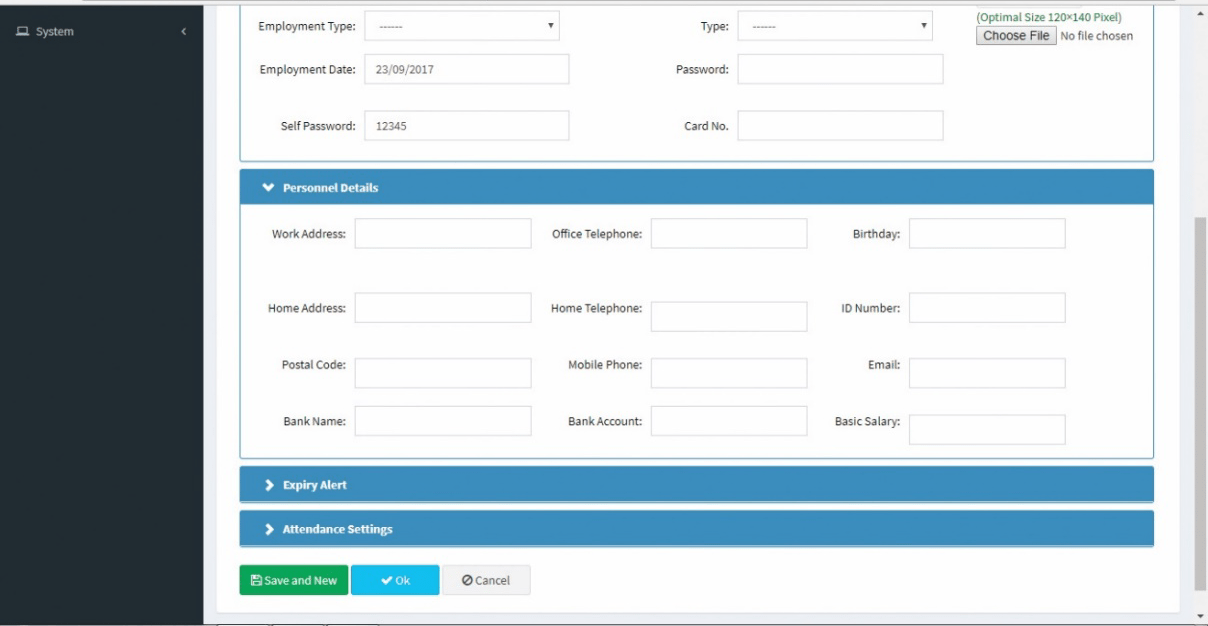
Personnel No: The length cannot exceed nice digits. For an employee No. with the length less than nine digits, one or more 0's are prefixed to make the length 9 digits. The numbers cannot be the same.
Click Check to check whether a number is exist or not.
Gender: Select a Gender.
Department: Select a department from the drop-down list. (If no department has been set, only the default departments existing in the system can be chosen).
Employment Type: Select the employee type from the drop-down list. It can be set to Permanent or Temporary.
Employment Date: It is set to the current date by default. The employment date is considered as the start date of attendance calculation. The attendance before this date is not calculated in the statistical result.
Self-Password: Set a self-password.
First Name: Enter first name.
Last Name: Enter last name.
Position: Select the position from the drop-down list.
Password: Set the personnel password. The black-and-white T&A device supports passwords with only five digits. The color-screen T&A device supports passwords with only eight digits. Passwords with digits exceeding the specified length are cut out by the system automatically. When you change a password, clear the old password in the text box and then enter the new password. Set to Employee or Contractor.
Card No: Assign card numbers to personnel for attendance checking. Enter the card No. manually or use a card enroller for issuing cards.
Set each parameter as needed.
EXPIRY ALERTS AND ATTENDANCE SETTINGS
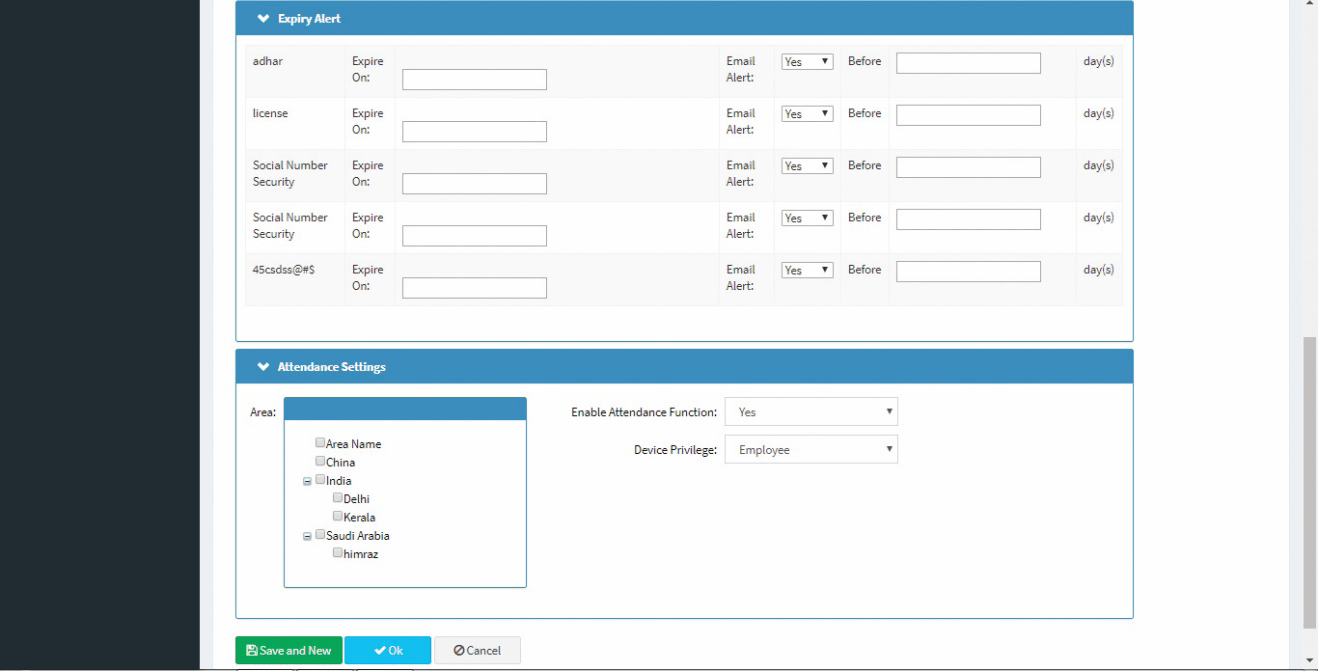
Set Area: Select Area
Enable Attendance Function (The default value is Yes and No means this employee is not included in the result of attendance statistics): For some top management personnel and temporary personnel requiring no attendance checking, it can be set to No.
Device Privilege: Set the permission of a user in the device, with the options including the following four types.
After the completion of setting, click OK to save the settings (click Save and New to add another employee) and return to the Personnel interface, and the information on the new employee is displayed in the personnel list.
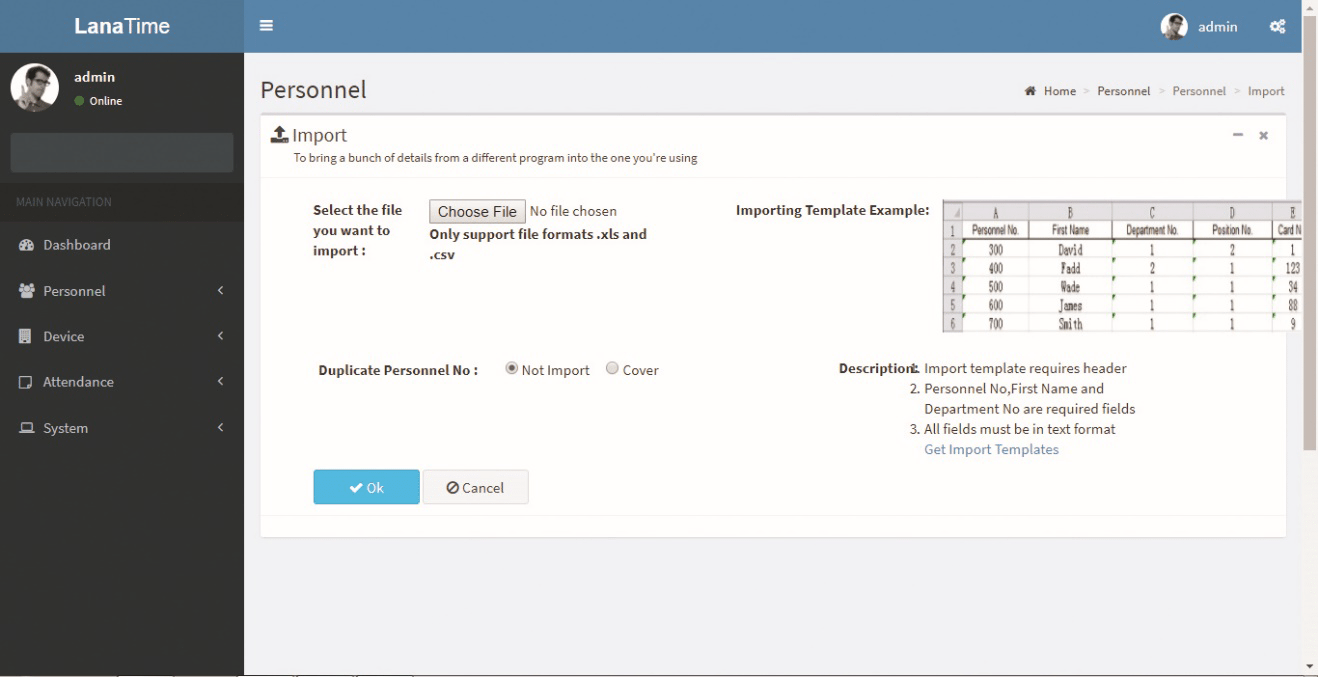
IMPORT PERSONNEL
Choose Personnel >> Personnel >> Option >> Import
Select file by clicking browse then click Get Import template then click OK button.
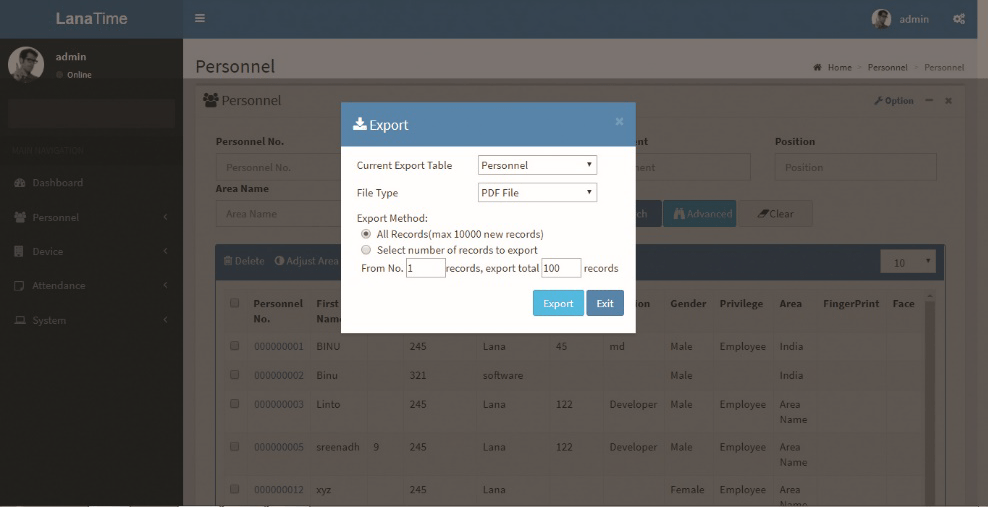
EXPORT PERSONNEL
Choose Personnel >> Personnel >> Option >> Export
Select Current Export Table and File Type from the drop down then Click Export button
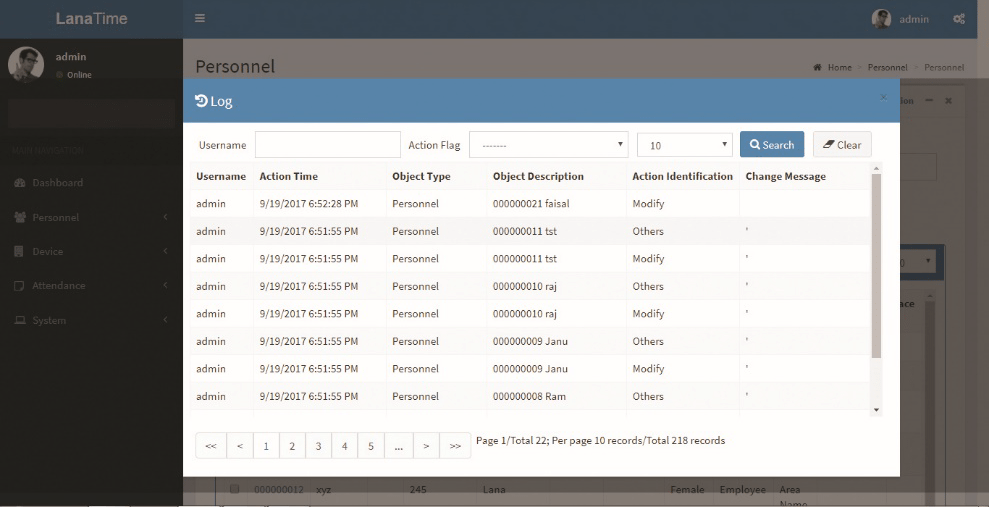
Log: In this whatever change in this software modification it will display in log.
DELETE EMPLOYEE
On the Personnel interface, select the employee (or employees) to be deleted, and click Delete on upper left of the personnel list to access the confirmation interface for deletion.
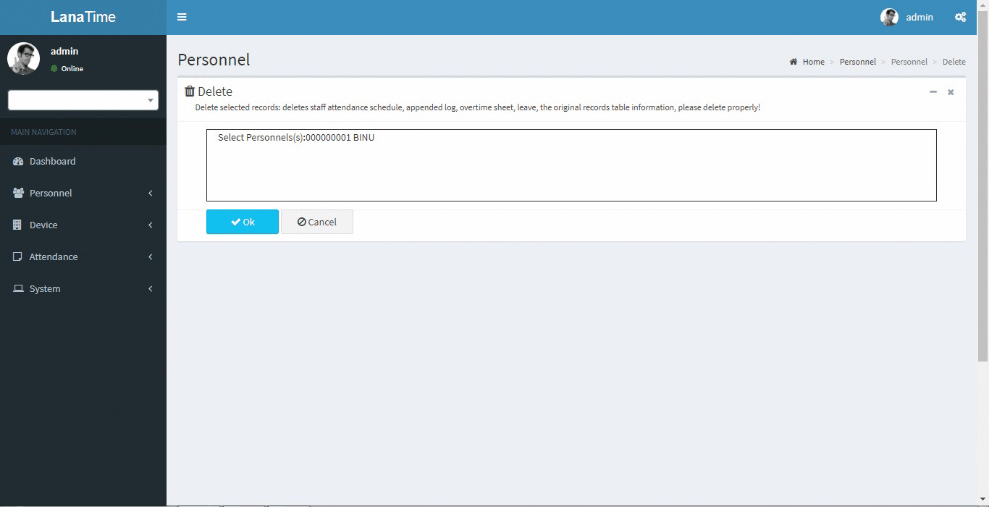
Click OK to complete the deletion operation.
Note: When you delete an employee, the information on this employee in the database is also deleted.
ADJUST AREA
On the Personnel interface, select the employee (or employees) that to adjust area, and click Adjust Area on upper left of the personnel list to access the confirmation interface for adjust area.
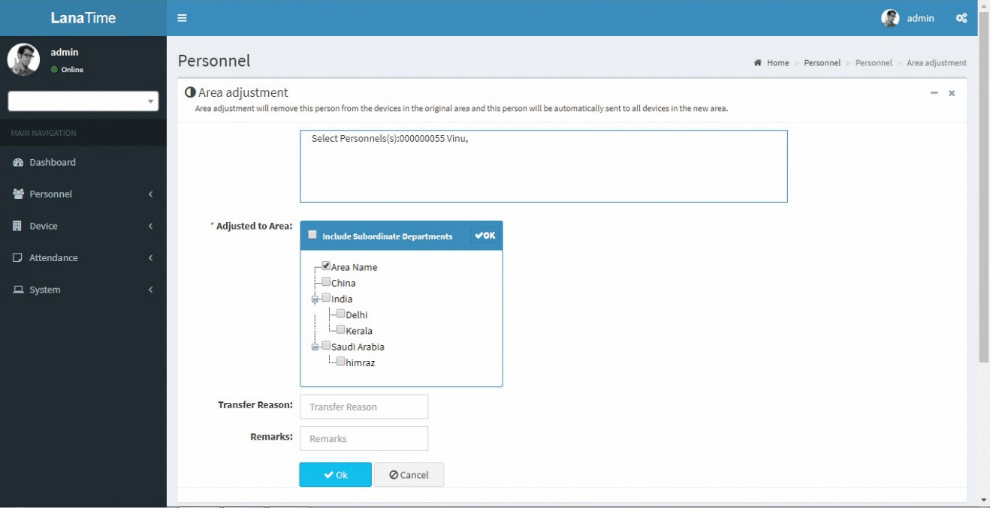
Set the parameters as required based on the following picture above:
Click OK to complete the adjust area operation.
ADJUST DEPARTMENT
On the Personnel interface, select the employee (or employees) that adjust department and click adjust department on upper left of the personnel list to access the confirmation interface for adjust department.
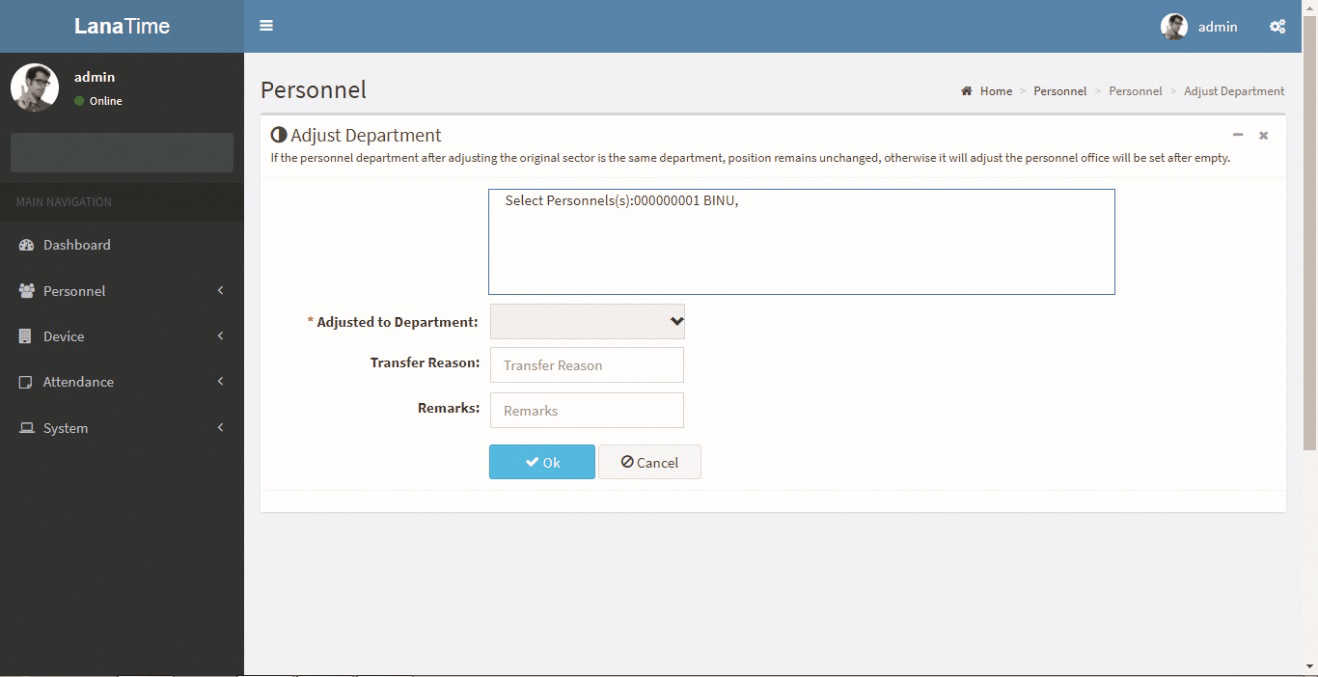
Set the parameters as required based on the picture above:
Click OK to complete the adjust department operation.