Before using the attendance function, enter the personnel for setting first: department settings for setting the main architecture of the company, and personnel settings for entering employees into system, allocating employees to departments and then conducting employee maintenance.
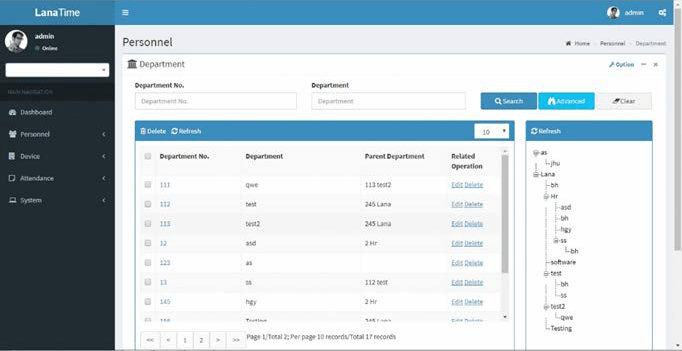
Choose Personnel >> Department to access the department management interface, as shown in the figure below.

Before managing company personnel, set the department organization structure of the company. When this system is used for the first time, a level 1 department named Department and numbered 1 already exists in the system by default. This department can be edited (modified) but cannot be canceled.
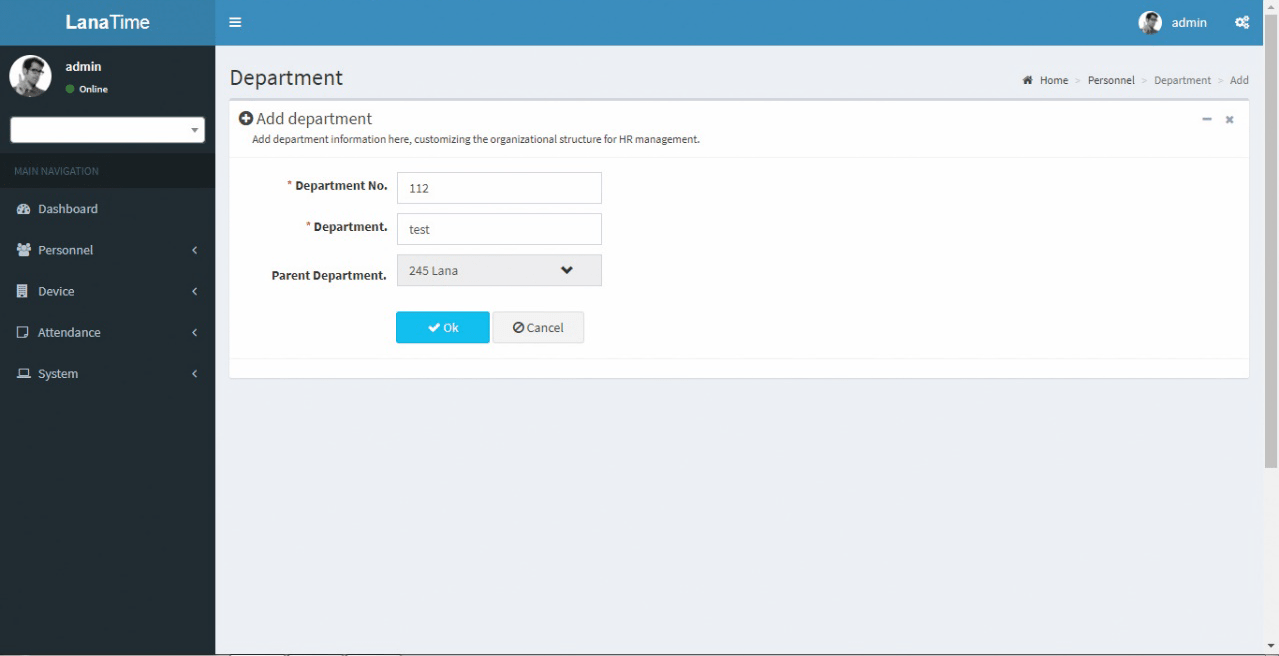
ADD DEPARTMENT
Choose Personnel >> Department > Option >> Add Department
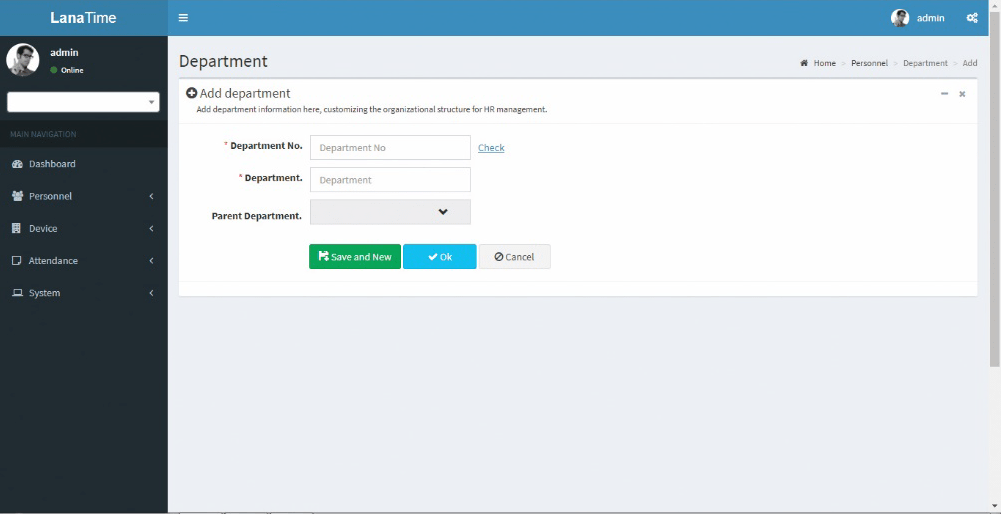
Set the parameters as required based on the following steps:
DEPARTMENT NO: Enter the department number. Click Check to check whether the entered department number is exist or not.
DEPARTMENT: Enter a Department Name.
PARENT DEPARTMENT: Click the drop-down list and select the department to which the position belongs. After the completion setting, click OK to save the settings (click Save and New to add another department) and return to the Department interface. The information on the new position is displayed in the department interface.
SET DEPARTMENT
Choose Personnel >> Department > Option >> Set Department
Select department and select personnel no or by name then select new department and new position then click OK.

EDIT DEPARTMENT
If the related department information changes in the company, you can use the department editing function to modify the department name, number and department. Directly click Department or Edit under Related Operation in the line of the department to be edited to access the editing interface for modification.
After the completion setting, click OK to save the settings and return to the Department interface. The information on the new department is displayed in the department interface.
DELETE DEPARTMENT
Select the department to be deleted, and then click Delete on upper left of the position list. Or directly click Delete under Related Operation in the line of department to be deleted to access the confirmation interface for position deletion.
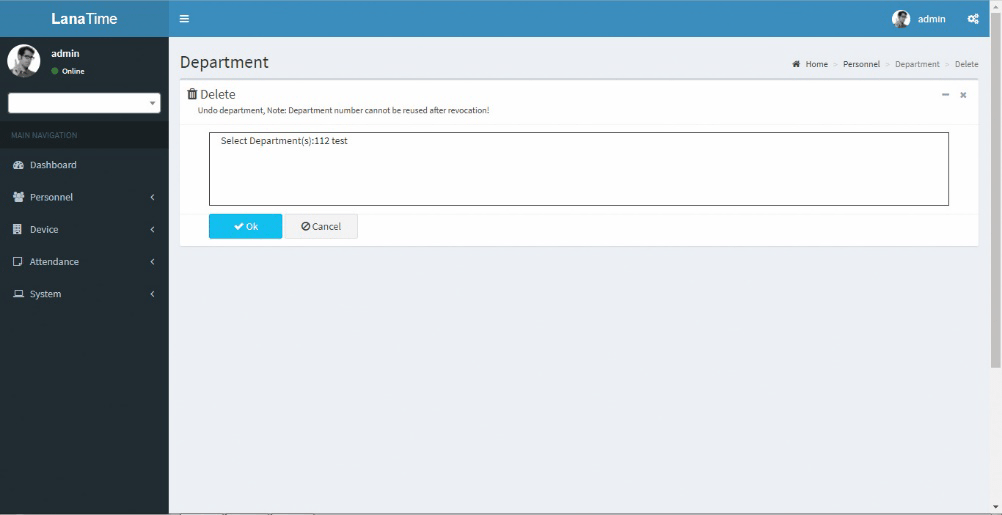
Click OK for confirmation of deleting the selected department.
IMPORT DEPARTMENT
Choose Personnel >> Department >> Option >> Import
Select file by clicking browse then click Get Import Template then click OK Button.
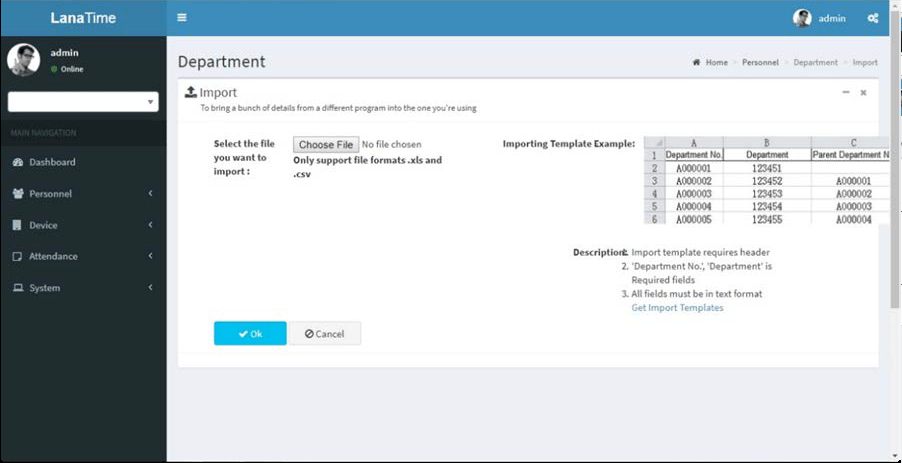
Click OK to Import Department.
EXPORT DEPARTMENT
Choose Personnel >> Department > Option > Export
Select the File Type from the drop down and Export method, then click Export button
Select Current Export Table and File Type from the drop down then click Export button Log.
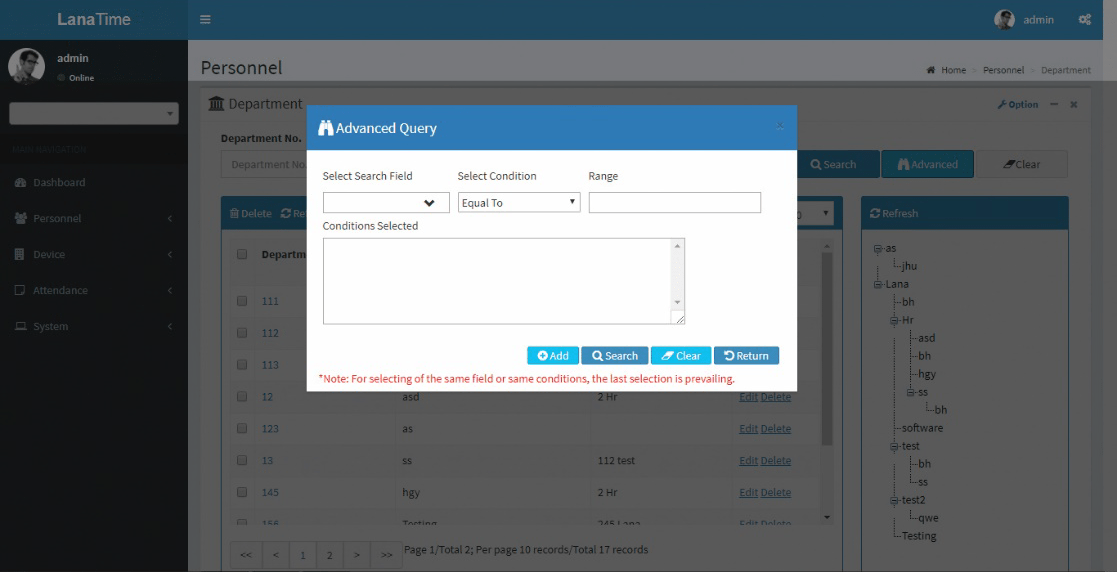
ADVANCED SEARCH
Advanced search is used for querying the efficiently by entering corresponding content in the fields according to the prompts. It helps to narrow the searches by a series of different conditions, ranges and fields.

Set the parameters as required based on the following steps:
search field: Select field from the drop down that need to be searched.
Select condition: Select the condition from the drop down to search.
Range: It is used to set range or key word to search.
Add: The search conditions are displayed in the list beneath Conditions Selected, and multiple search conditions can be selected. The same field and the same condition can be selected only once.
Search: Searching displays the result according to the conditions.
Clear: This button is used to clear the conditions.
Return: Button is used to return from the current form.